

Make a tender, flaky pie crust with cake flour, plus how it compares to other flours.
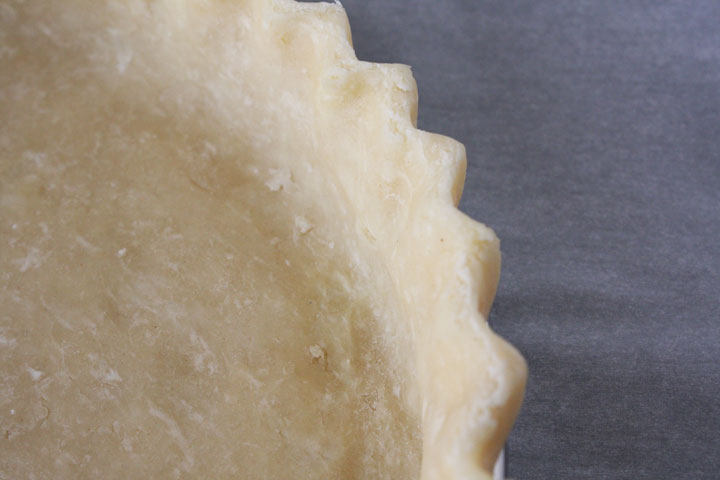
Cake flour is my go-to for pie crust, and it might surprise you why.
It's one of the lowest-protein flours you can buy. Less protein means less gluten. And less gluten is exactly what you want for a crust that comes out tender and flaky instead of tough.
Here's the thing about pie dough. It isn't about hitting exact measurements. It's about what the butter and flour are doing in the bowl. Once that part makes sense, a good crust gets a lot easier. That's what I want to walk you through.
Below I'll show you why cake flour works, how it stacks up against pastry, all-purpose, and bread flour, and the recipe I reach for every time I make one of my pie and tart recipes.
Can You Use Cake Flour for Pie Crust?
Yes. Cake flour makes a tender, flaky pie crust, and it's one of the best flours you can reach for.
Here's why. Every flour has protein in it, and when that protein meets water it forms gluten. Gluten gives dough its structure and its chew. That's great in bread. It's not what you want in pie crust, where too much gluten leaves you with a tough crust.
Cake flour sits at the low end for protein, usually around 7 to 8 percent. All-purpose runs higher, closer to 11 or 12. So when you start with cake flour, you're working with less gluten from the very first step. That gets you a softer, more delicate crust without much effort.
One thing to keep in mind. A lower-protein dough is more tender, so it can feel a little fragile when you roll it out. That's not a problem as long as you keep it cold and handle it gently. I'll show you exactly how in the tips further down.
Best Flour for Pie Crust, Compared
Flour choice comes down to one thing: protein. The less protein a flour has, the less gluten forms, and the more tender your crust turns out. Here's how the four flours you're most likely to have stack up.
| Flour | Protein | What you get |
|---|---|---|
| Cake flour | 7 to 8% | The most tender, delicate crust. My pick. |
| Pastry flour | 8 to 9% | Very close to cake flour. A little more structure. |
| All-purpose | 11 to 12% | Sturdier and easier to handle. Slightly less tender. |
| Bread flour | 12 to 14% | Skip it. Too much gluten, too tough. |
Protein varies by brand, so check the bag.
Cake flour is what I use and was taught by pastry chef instructors. It has the lowest protein, so you get the most tender crust. The trade-off is a dough that's a touch more delicate to roll, but follow my tips below and you will have success.
Pastry flour is close to cake flour with only slightly higher protein, so it behaves almost the same and gives you a little more to hold onto. If you already keep pastry flour around, you'll be happy with it here.
All-purpose flour is the one most people have, and it absolutely works. You'll get a sturdier crust that's a bit easier to roll and move around. It won't be quite as tender as the cake flour version, but it's a solid, dependable crust.
Bread flour is the one to leave on the shelf. It's built for chew, which is exactly what you don't want in a pie. You'll end up with a tough crust no matter how careful you are.
If you want the proper name for it, this is a pâte brisée, the classic French pie dough. This cake flour version is the one I learned in pastry school.
Want to go deeper on differences between these flours and where else to use them? I break it all down in my guide to the types of flour used in baking.
Where the Flakes Come From
Low-protein flour gets you a tender crust. But tender and flaky aren't the same thing. The flakes come from the butter.
Here's what's happening. You leave small chunks of butter in your dough instead of blending them all the way in. When the crust hits the hot oven, those chunks melt and give off steam. The steam pushes the dough apart and leaves a little pocket behind. Do that a few hundred times across the crust and those pockets are your flakes.
Two things are essential for a perfect texture:
Keep the butter cold. This is the one that matters most. If the butter softens or melts before the crust goes in the oven, there's no steam, and no steam means no flakes. Cold butter, cold dough, straight from the fridge to the oven. That's what works.
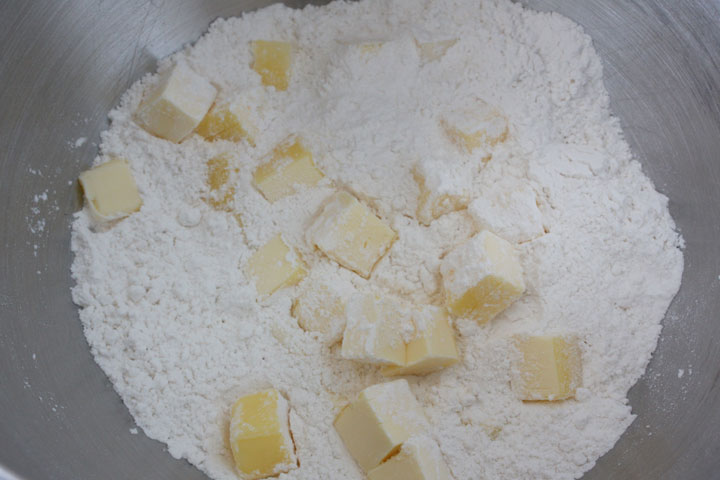
Watch the size of the butter. You want the pieces about the size of a pea. Too big and the butter melts into a hole instead of a pocket. Too small and it blends into the dough and you lose the flakes altogether. Pea size is the sweet spot.
What You'll Need
Just five things, and you probably have most of them already.
Cake flour. The whole reason this crust turns out so tender. If you missed why, scroll back up to the flour breakdown. Measure it spooned and leveled, not scooped, so you don't pack in too much. Best would be to measure with a scale if you have one.
Unsalted butter. Cut into small cubes and keep it cold right up until it goes in the bowl. Cold butter is what gives you the flakes, so I cube mine and pop it back in the fridge while I get everything else ready.
Salt. Just a little, for flavor. Salt also tightens up gluten, so a pinch is all you want here. Any more and you're working against the tender crust you're after.
Sugar. A small amount. It's not there to make the crust sweet, just to round out the flavor and help with a little color as it bakes.
Ice water. Cold is the point. Warm water wakes up the gluten and warms your butter, and you don't want either. I set out a little over a quarter cup with ice in it and use only what the dough actually needs, which is usually less than you'd think.
How to Make It
The measurements are in the recipe card below. What matters most is how you handle the dough, so here's what to keep in mind at each step.
Cut the cold butter into the flour. Whisk the flour, salt, and sugar first, then work in the cold butter until the pieces are about the size of peas. A stand mixer with the paddle works, so does a food processor pulsed a few times, or your hands. Stop while you can still see chunks of butter. You'll want to keep going until it looks smooth. Don't. Those chunks are what turn into flakes.
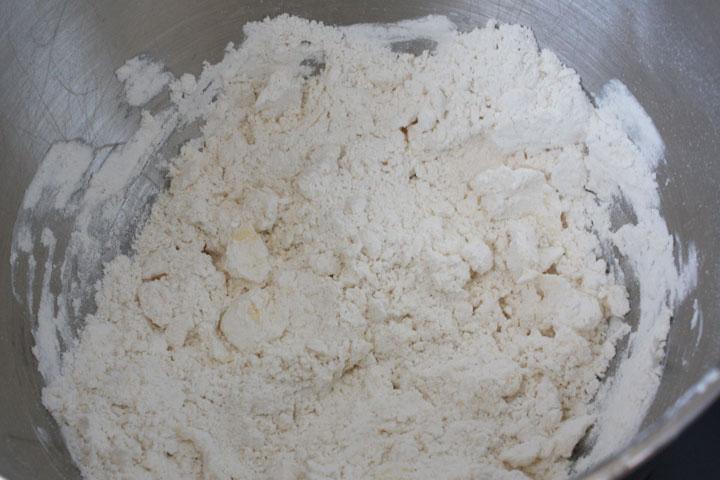
Add the ice water slowly. A tablespoon at a time, and stop the second the dough holds together when you squeeze it. Too much water wakes up the gluten and toughens the crust. It should look shaggy, not smooth. You'll almost always need less than you think.
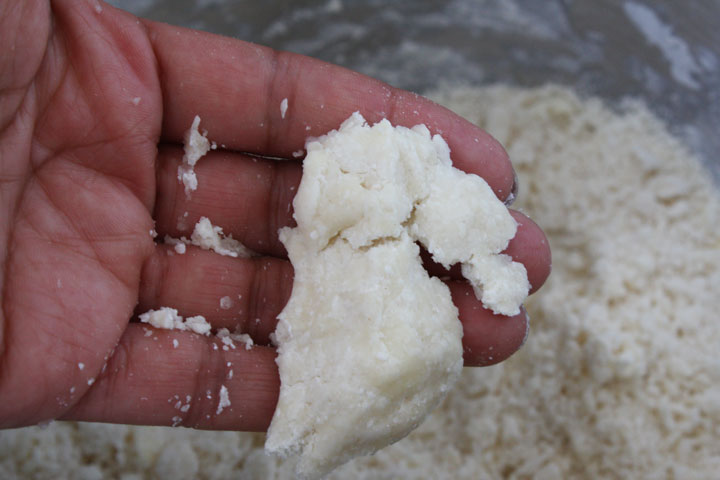
Barely handle it. Once it clumps, bring it together into a disk and stop. No kneading, no smoothing, no tidy ball. Every extra press builds gluten. Streaks of butter running through the dough are a good sign, so leave them. Wrap it flat so it's easier to roll later.
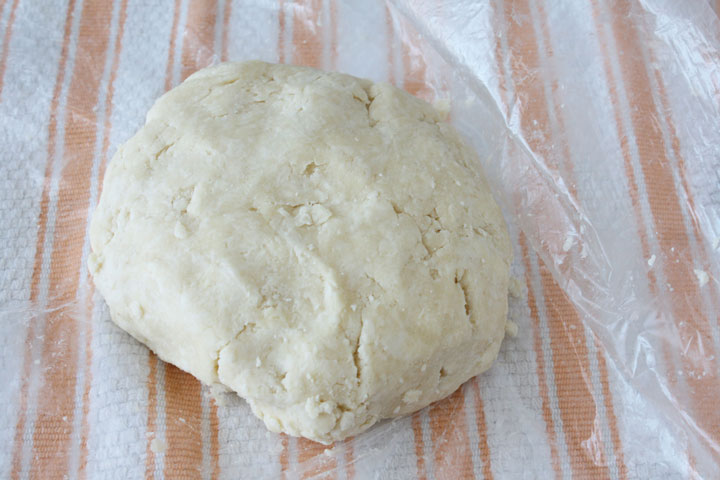
Chill, then chill again. Rest the dough at least an hour before you roll it. Then chill it one more time once it's shaped, before it bakes. Cold dough into a hot oven is what sets the flakes. This is the step people skip when they're rushing, and it's the one that matters most.
Sweet or Savory: What to Make With It
This is a neutral crust, so it works both directions. There's just a little sugar in it for flavor, not enough to make it sweet, which means you can use it for dessert or dinner without changing a thing.
On the sweet side, it's right at home under a caramel walnut pumpkin pie, a batch of mini apple pies, or mini chocolate pecan pies. Any fruit pie or classic holiday pie is a good fit.
On the savory side, it's exactly what you want for a spring vegetable quiche or a tomato fennel tart. The tender, flaky texture holds up to a wet filling without turning to cardboard.

One thing worth knowing. If your filling doesn't bake long, or you want a crisp bottom, you'll want to blind bake the crust first. I walk through exactly how in my guide to blind baking a pie crust.
Looking for something sweeter? For fruit tarts and tartlets, I reach for my sweet tart dough instead. It's a pâte sucrée, more tender and crumbly than flaky, and made for that kind of dessert.
Make Ahead, Storing, and Freezing
This dough is a good one to make ahead. In fact it's better for it, since the rest gives the gluten time to relax and the butter time to firm back up.
Make ahead. Mix the dough, wrap it flat in plastic, and keep it in the fridge. Overnight is ideal, and it holds for up to a week before you roll it.
Freezing. This dough freezes well for up to a month. Wrap the disk tightly in plastic, then add a second layer so it doesn't pick up freezer smells or dry out.
Thawing. Move it from the freezer to the fridge and let it thaw overnight before you roll it. Rolling cold dough is easier and keeps the butter where you want it.
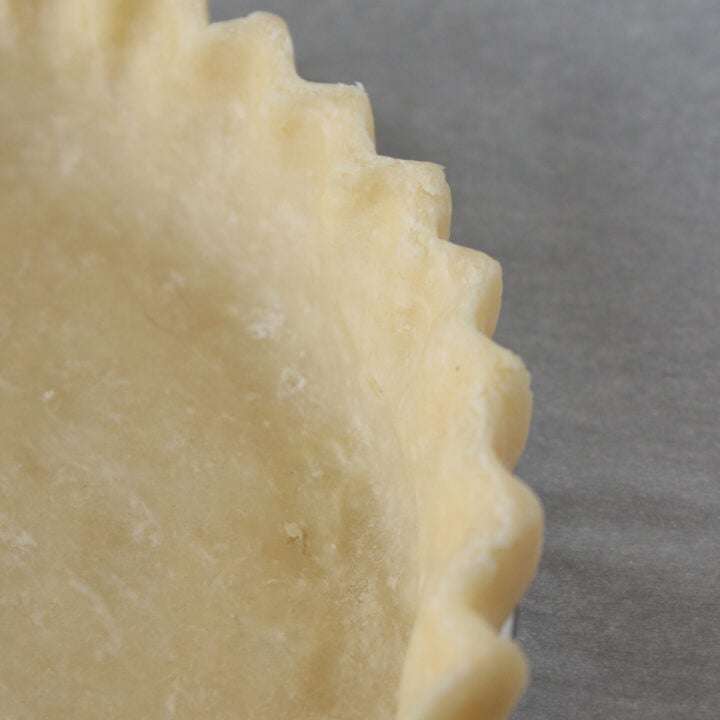
Cake Flour Pie Crust
A tender, flaky pie crust made with cake flour. Works for sweet or savory pies and tarts, and the dough keeps up to a week in the fridge or a month in the freezer.
Ingredients
- 1 ⅔ cup cake flour (190g)
- ½ cup unsalted butter, cubed into ½ inch pieces, and chilled (112g)
- ½ teaspoon salt
- ½ teaspoon sugar
- ice cold water, prepare a little over ¼ cup...only you will be able to judge how much is actually needed
Instructions
- Mix the flour, salt and sugar together on slow speed with a paddle attachment. Add the chilled butter cubes and paddle it on low speed until the butter is the size of peas. Don't worry if you see one or two larger pieces. You can break them by hand later if they are still there. The point is, you do not want to over mix or make the butter too small.
- Next, add the ice water a tablespoon at a time while mixing. You want the dough to be wet but not formed itself into a ball. Remove the mixture onto the tabletop and check the texture by hand. The crumbly mixture should form clumps when you press some of it with your hand. If I think it is too dry, I sprinkle my hands with cold water and work the dough. This way I don't accidentally add too much moisture. Do not knead it too much, just enough to be able to wrap up the dough in plastic. You will see streaks and spots of butter. This is good!
- Chill the dough for at least an hour or overnight. Longer is better as this allows the gluten to relax and butter to firm up. Once you have rolled out your dough for your recipe, be sure to chill it again. Your crust should always go straight from refrigerator to oven for best results.
Nutrition Information:
Yield: 8 Serving Size: 1 sliceAmount Per Serving: Calories: 196Saturated Fat: 7gCholesterol: 30mgSodium: 147mgCarbohydrates: 19gProtein: 3g

KHF says
There is no denying that a great pie crust is a science! It took me several years to perfect my crust, although it was mostly through trial and error. I wish someone had explained the scientific art to me in this way when I first started to bake.
I've found that the food processor set to pulse achieves a similar result to the paddle attachment on the mixer for anyone that has one appliance and not the other.
Tanvi@SinfullySpicy says
Hi Urvashee,
Stumbled upon this tutorial from the internet.Thanks so much.I dont like the taste of store bought pie crusts and prefer making them at home.The biggest problem I face is the thickness to which the home made crust has to be rolled out.Seldom my the top crust sinks or fluffs up way too much in the oven.Do you have any tips or approximations on that?
You have a beautiful space.You will find me quite often here now :)
Dessarts says
Hi Tanvi,
Thanks so much for visiting! I usually roll my dough out to about a little over and 1/8th of an inch in thickness. As far as a sinking top crust goes, I'm afraid I do not have too much experience with that. Fluffing up can be prevented by cutting some slits in the top so that steam can escape.
chitra says
great site!loved it!
it made a lot of the gluten funda clear ,but what if one doesn't have a food processor? does mixing to the breadcrumb consistency with fingertips work as well?
Dessarts says
Hi Chitra,
You can make excellent tart dough by hand. Just use something to cut in the butter that has a flat edge. I use my cake frosting smoother but it can be anything.
Fuyu Cantabile says
Hello ^^
I just stumbled upon your recipe, and I'm hoping to try this soon ^^
I'm just curious, when will you know if you've already over-beaten the batter? That's one of my problems, you see. I bake by myself, so I can't really let anyone tell me >.<"
Dessarts says
You should still see streaks of butter in your dough. Also, don't roll it into a completely smooth ball-stop once it clumps, bring it together with you hands without pressing it too much, wrap, and chill.
Garima says
Hey Urvashee, what would one use for all purpose flour in India? We don't as such get flour in Common grocery stores labelled as "all purpose", it is mostly either aata or maida. What do you re omen should be used for a pie crust or a tart crust, considering one wants flaky pastry on top of a chicken pot pie but a soft crumbly crust beneath a lemon tart?
P.S. I live your recipes, great effort.