

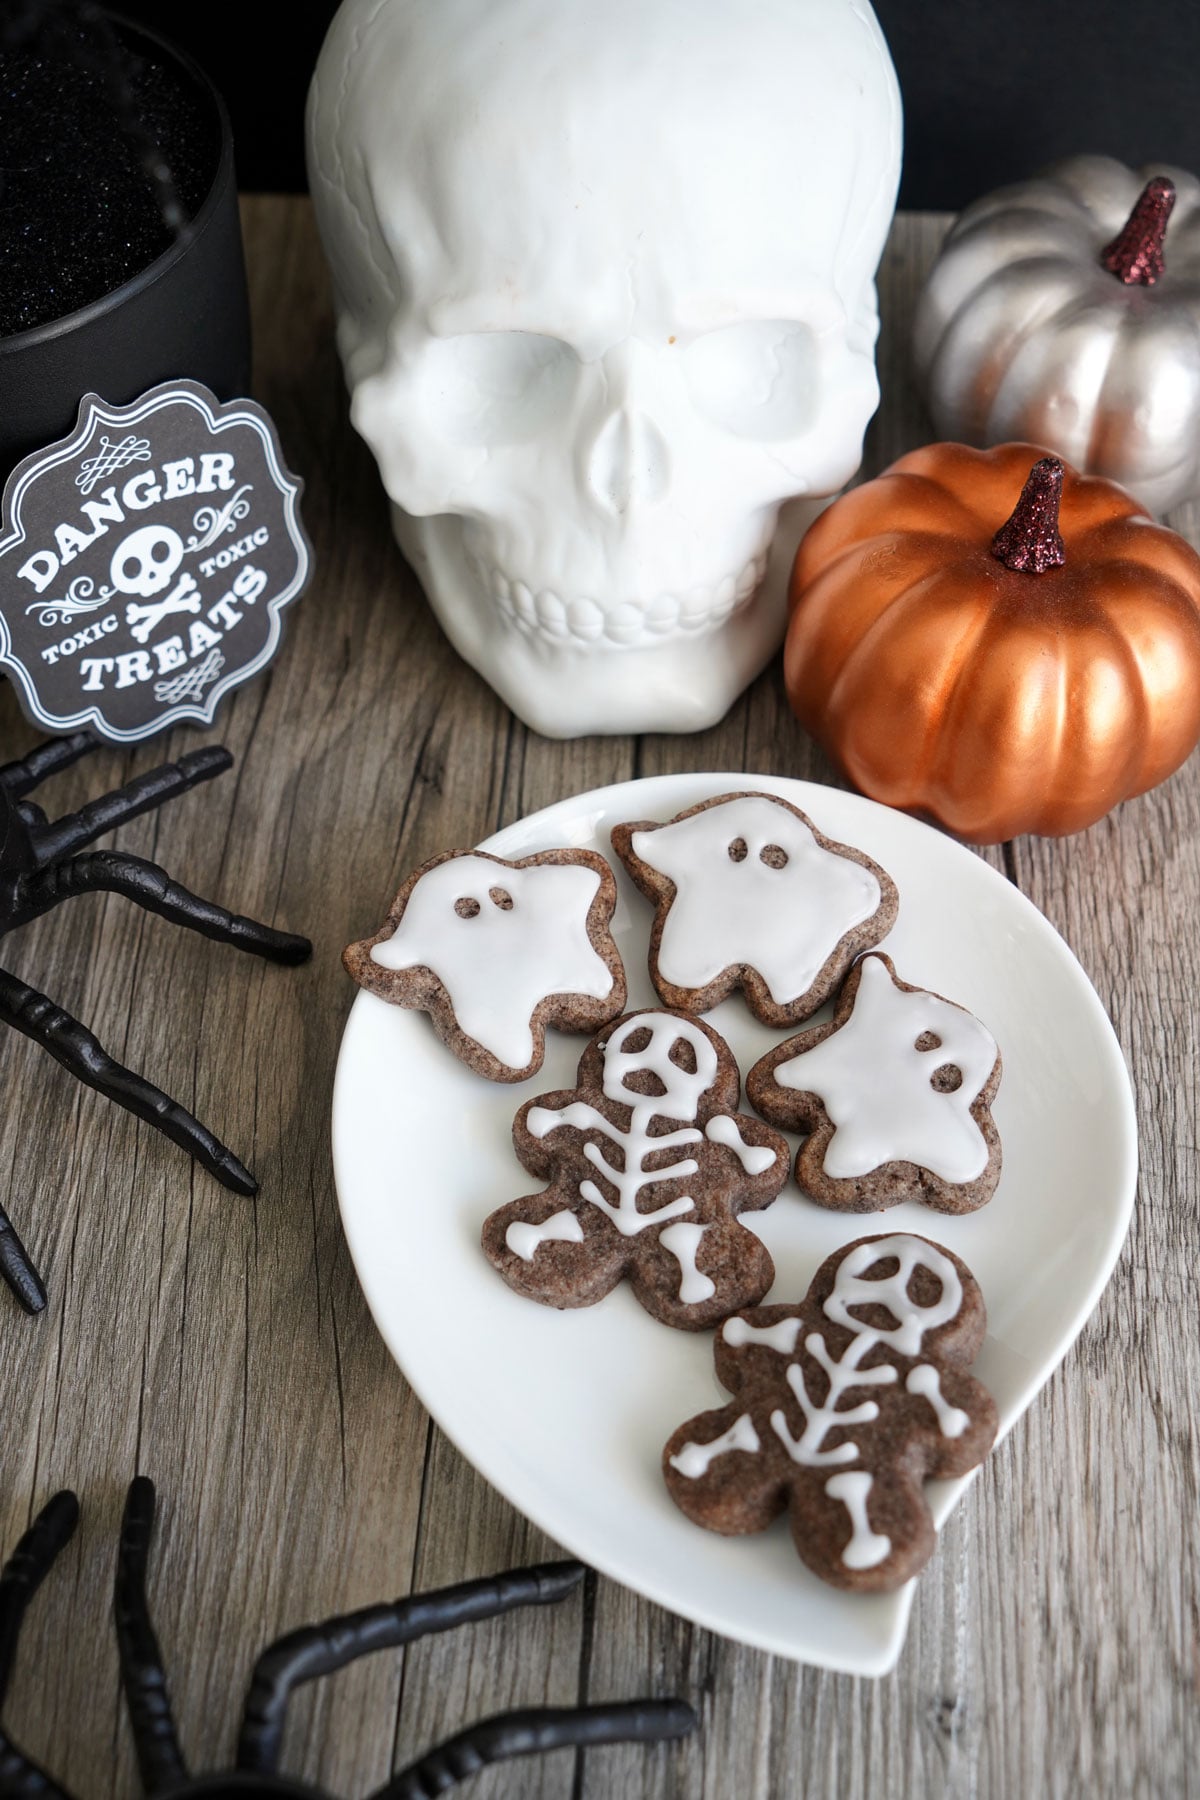
Speckled Oreo dough, four spooky shapes, and a two-ingredient icing. These Halloween sugar cookies look festive before you even start decorating.
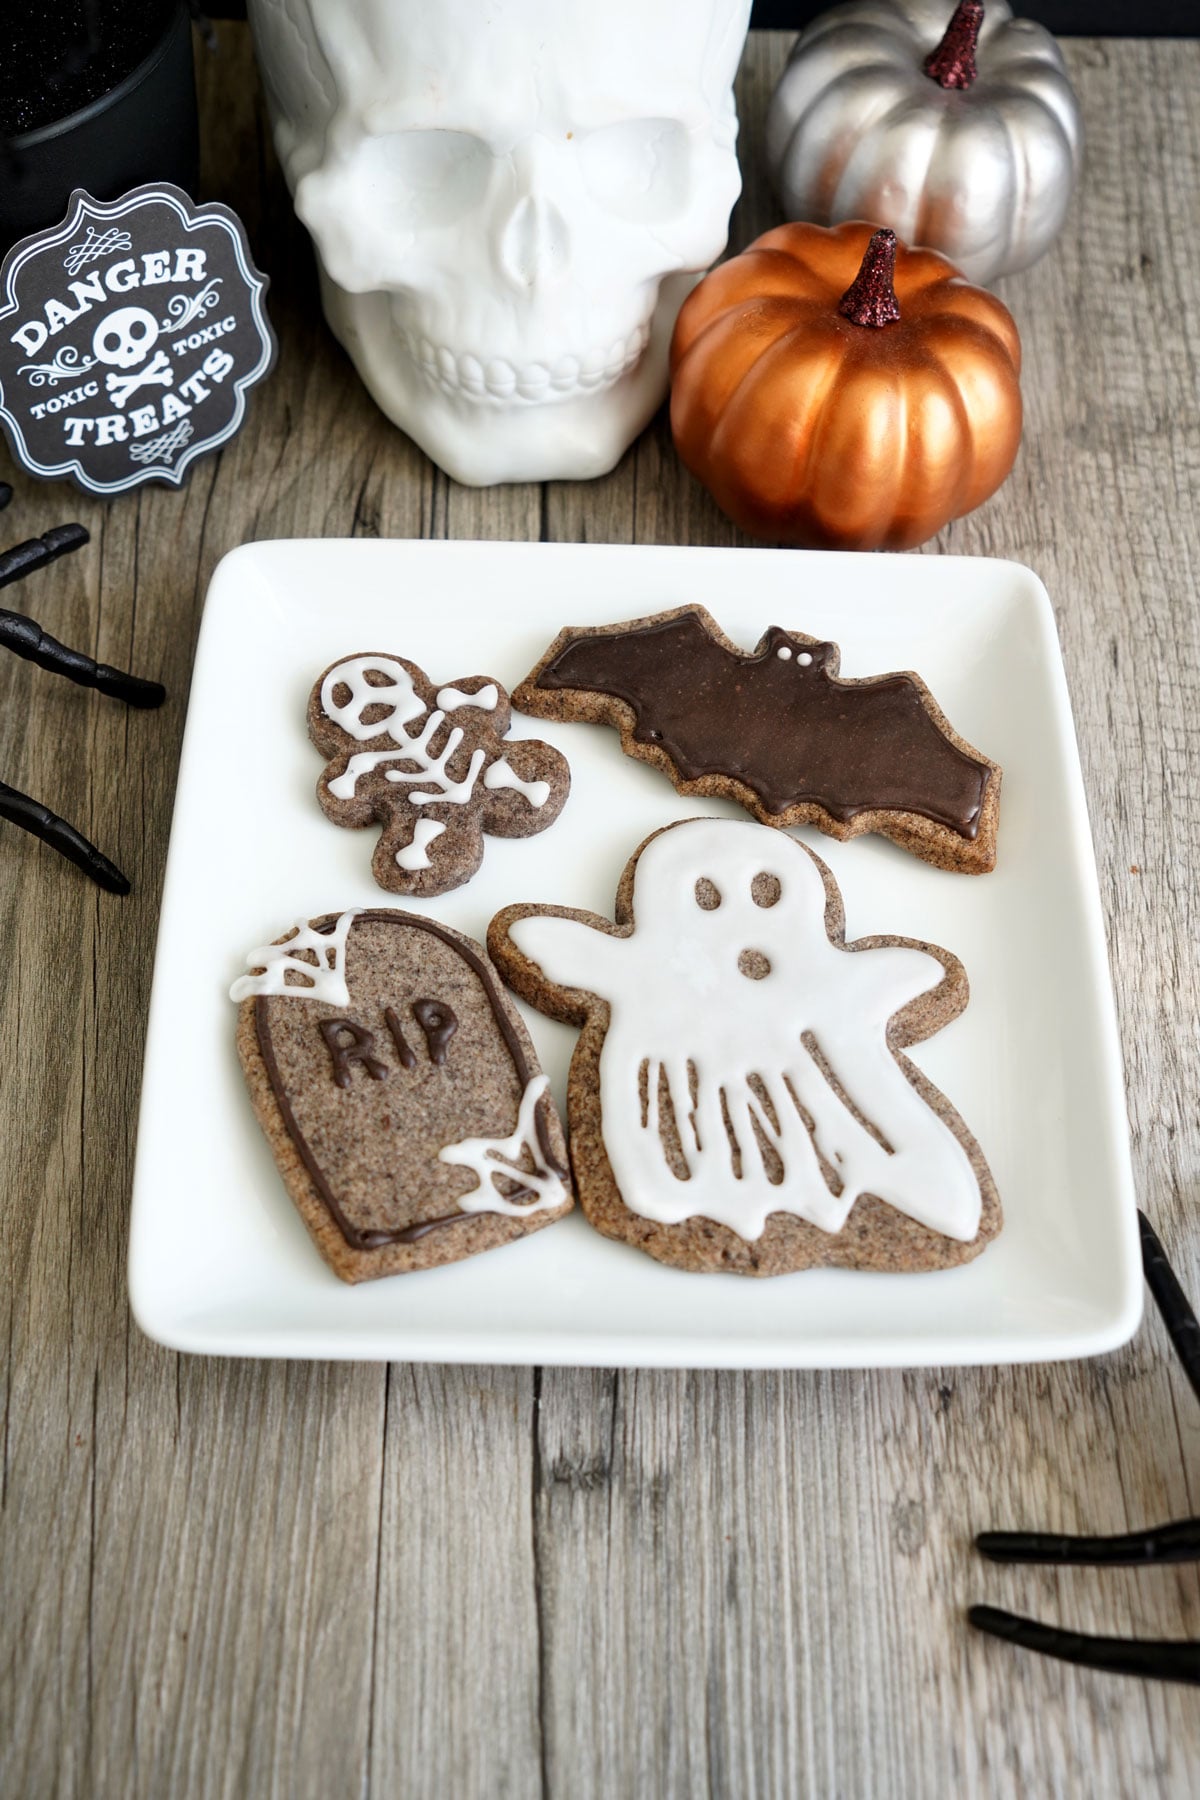
A good Halloween sugar cookie recipe has one job. Your bats need to still look like bats when they come out of the oven. This dough holds its edges and bakes flat on top, so the icing goes on smoothly.
It also gives you a head start on decorating. Crushed Oreos turn the dough speckled and gray, so the cookies already look like Halloween before you add any icing. The dough comes from my Oreo sugar cookies, which has its own post if you want more on how it works.
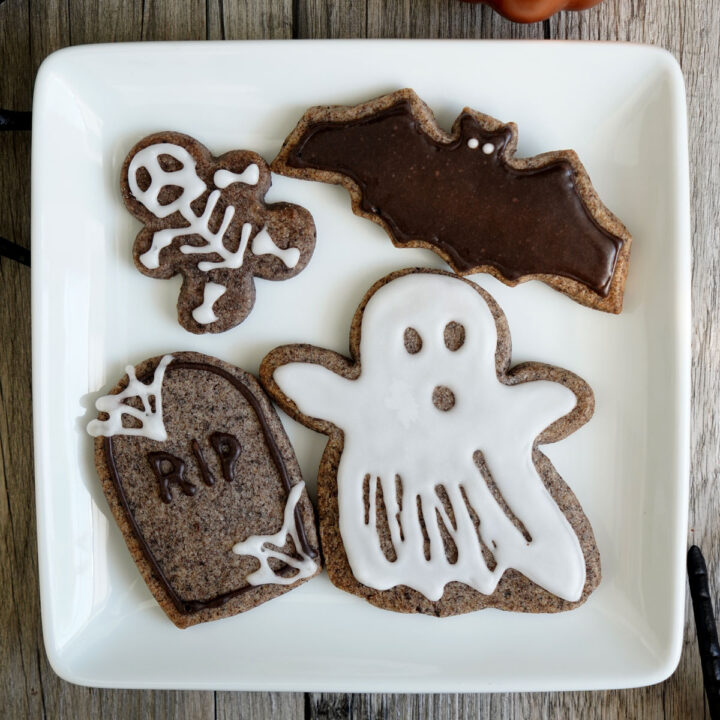
From one batch you can make tombstones, ghosts, bats, and skeletons. You don't need to be an expert decorator. The tombstones need only a few letters and no flooding. The ghosts don't need to be perfect, and the eyes and mouth are just gaps you leave in the icing.
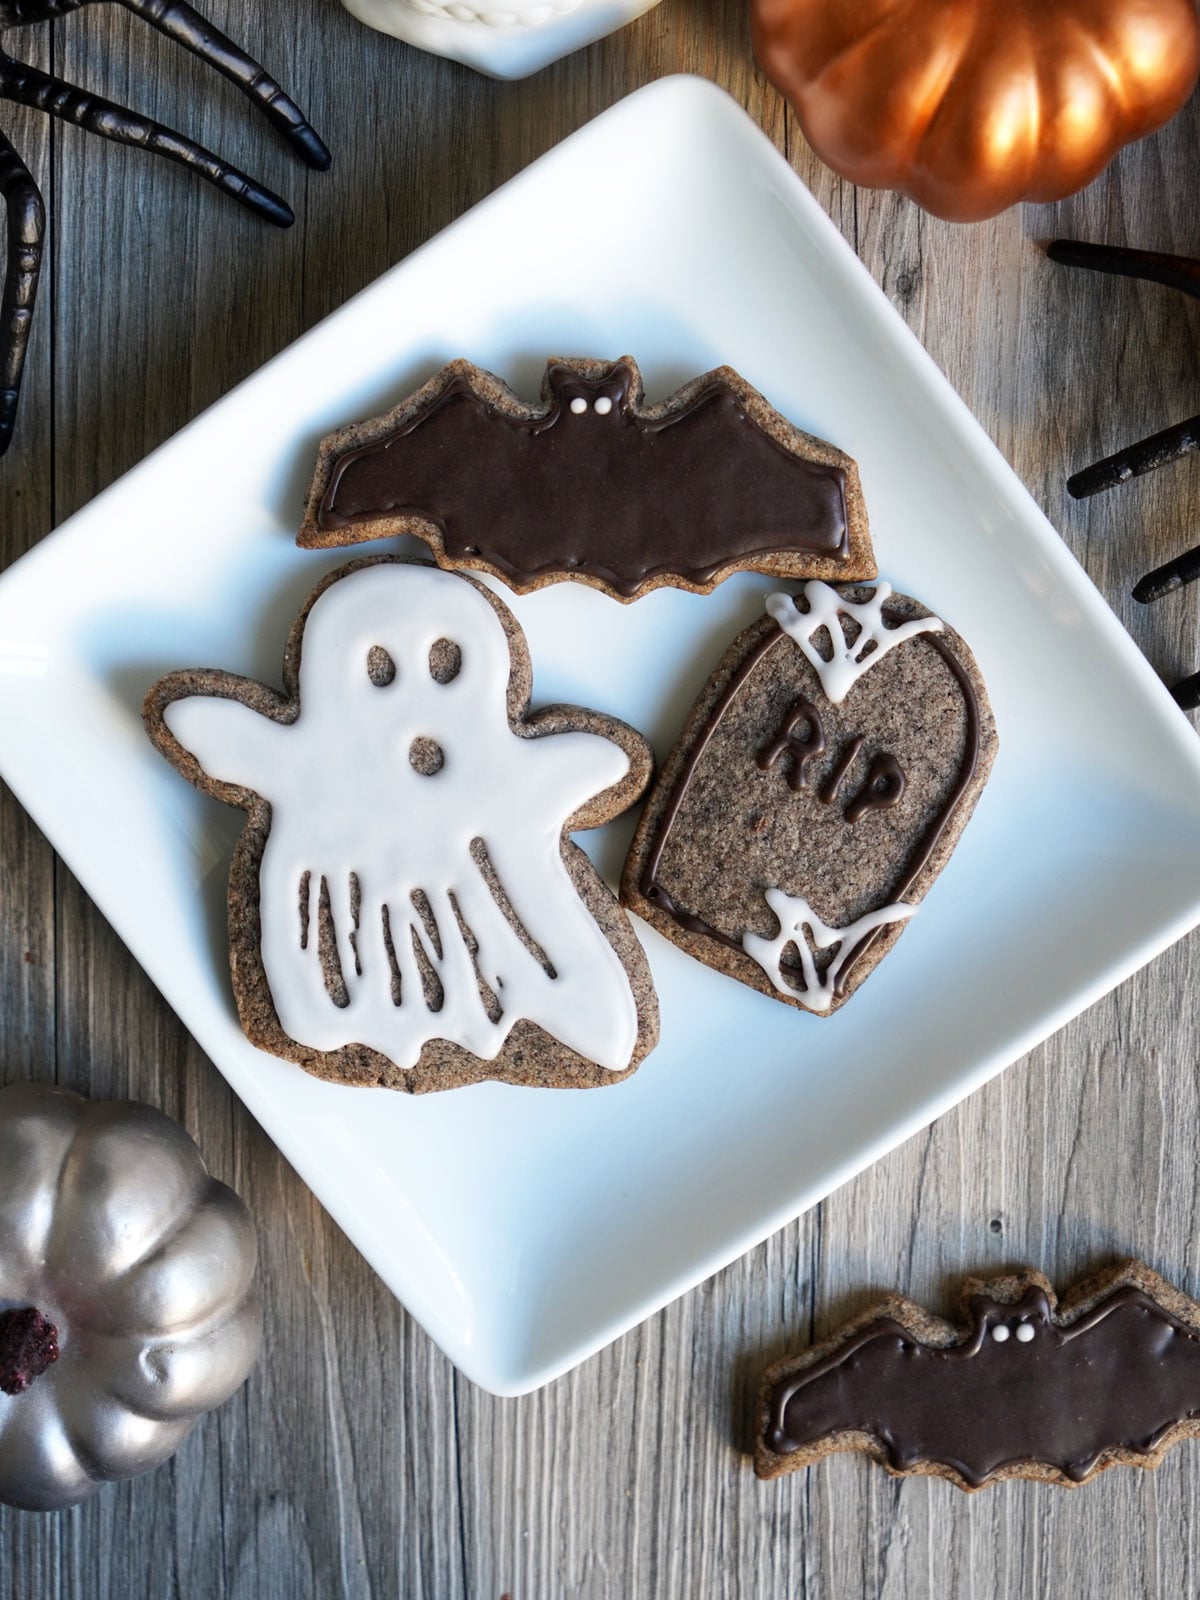
To keep things extra easy, there are only two icing colors on these cookies, and one of them is white! The easy cookie icing takes two ingredients and a fork. You won't need food coloring either, because the black icing gets its color from black cocoa.
Why This Dough Works for Halloween Cookies
Oreo crumbs mixed into the dough bake up speckled and gray, like weathered stone. That makes these cookies perfect for tombstones. Pipe a few letters in white or black icing and they're done. No flooding needed.
The same speckled base works for every other shape too. White icing stands out against the darker cookie, so ghosts and skeletons show up clearly. Like the tombstones, the skeletons don't need any flooding either. For bats, the cookie peeks out around the edges of the black icing and gives them a textured border.
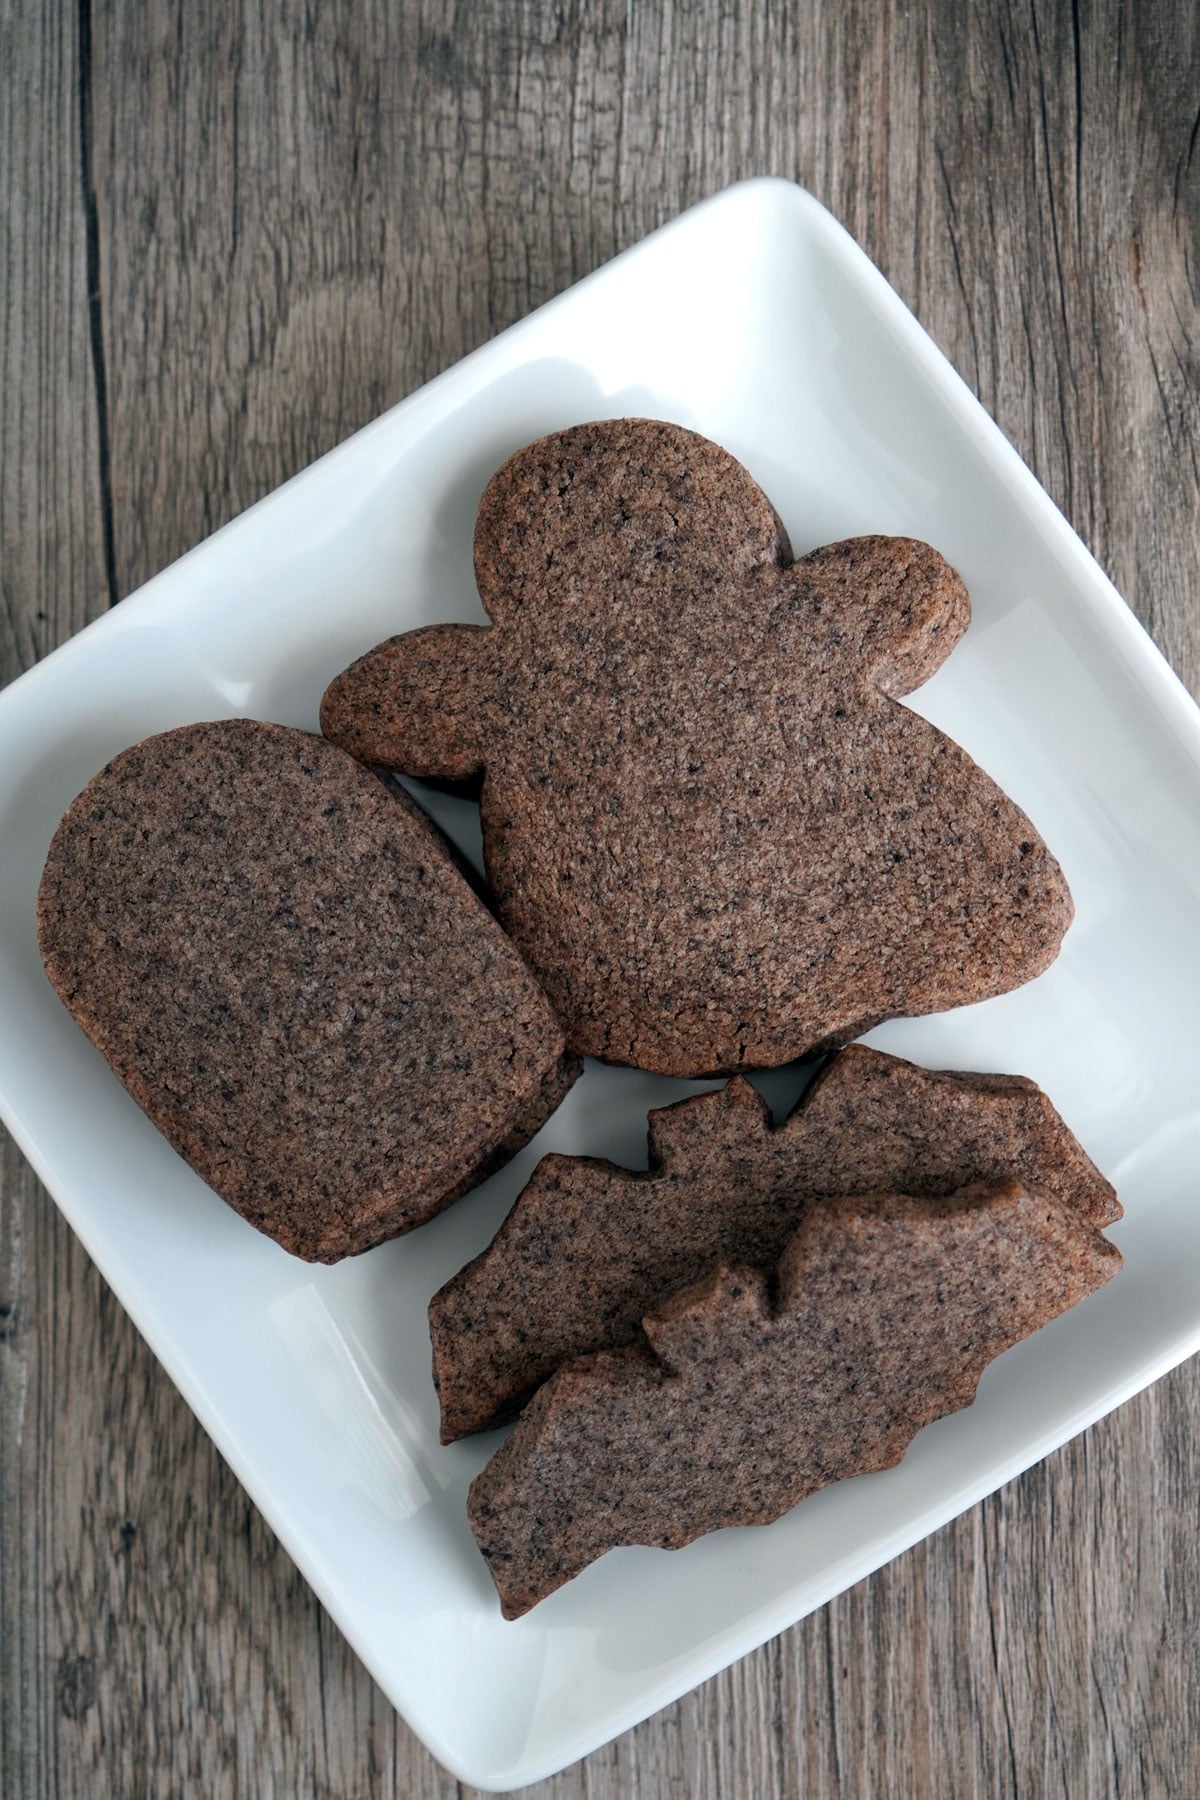
Because the cookie itself does so much of the work, you can decorate as much or as little as you like. A plain speckled tombstone with RIP piped across it already looks finished.
How to Make Halloween Sugar Cookies
This dough comes together quickly in a food processor, and the recipe is written for that method. If you don't have one, you can use an electric mixer instead, but it may be hard to get an even crumb if you have to crush the Oreos by hand.
Start by pulsing whole Oreos, filling and all, into crumbs. Don't leave large chunks, but don't make the crumbs too fine either, or the dough turns darker and streaky. Whisk the crumbs into the flour, baking powder, and salt so they spread evenly through the dry ingredients.
Next, process the cold cubed butter with the sugar until light and fluffy. Add the egg and vanilla, then pulse in the dry ingredients just until the dough comes together. If it isn't mixing well in the food processor, turn it out into a bowl and finish it by hand.
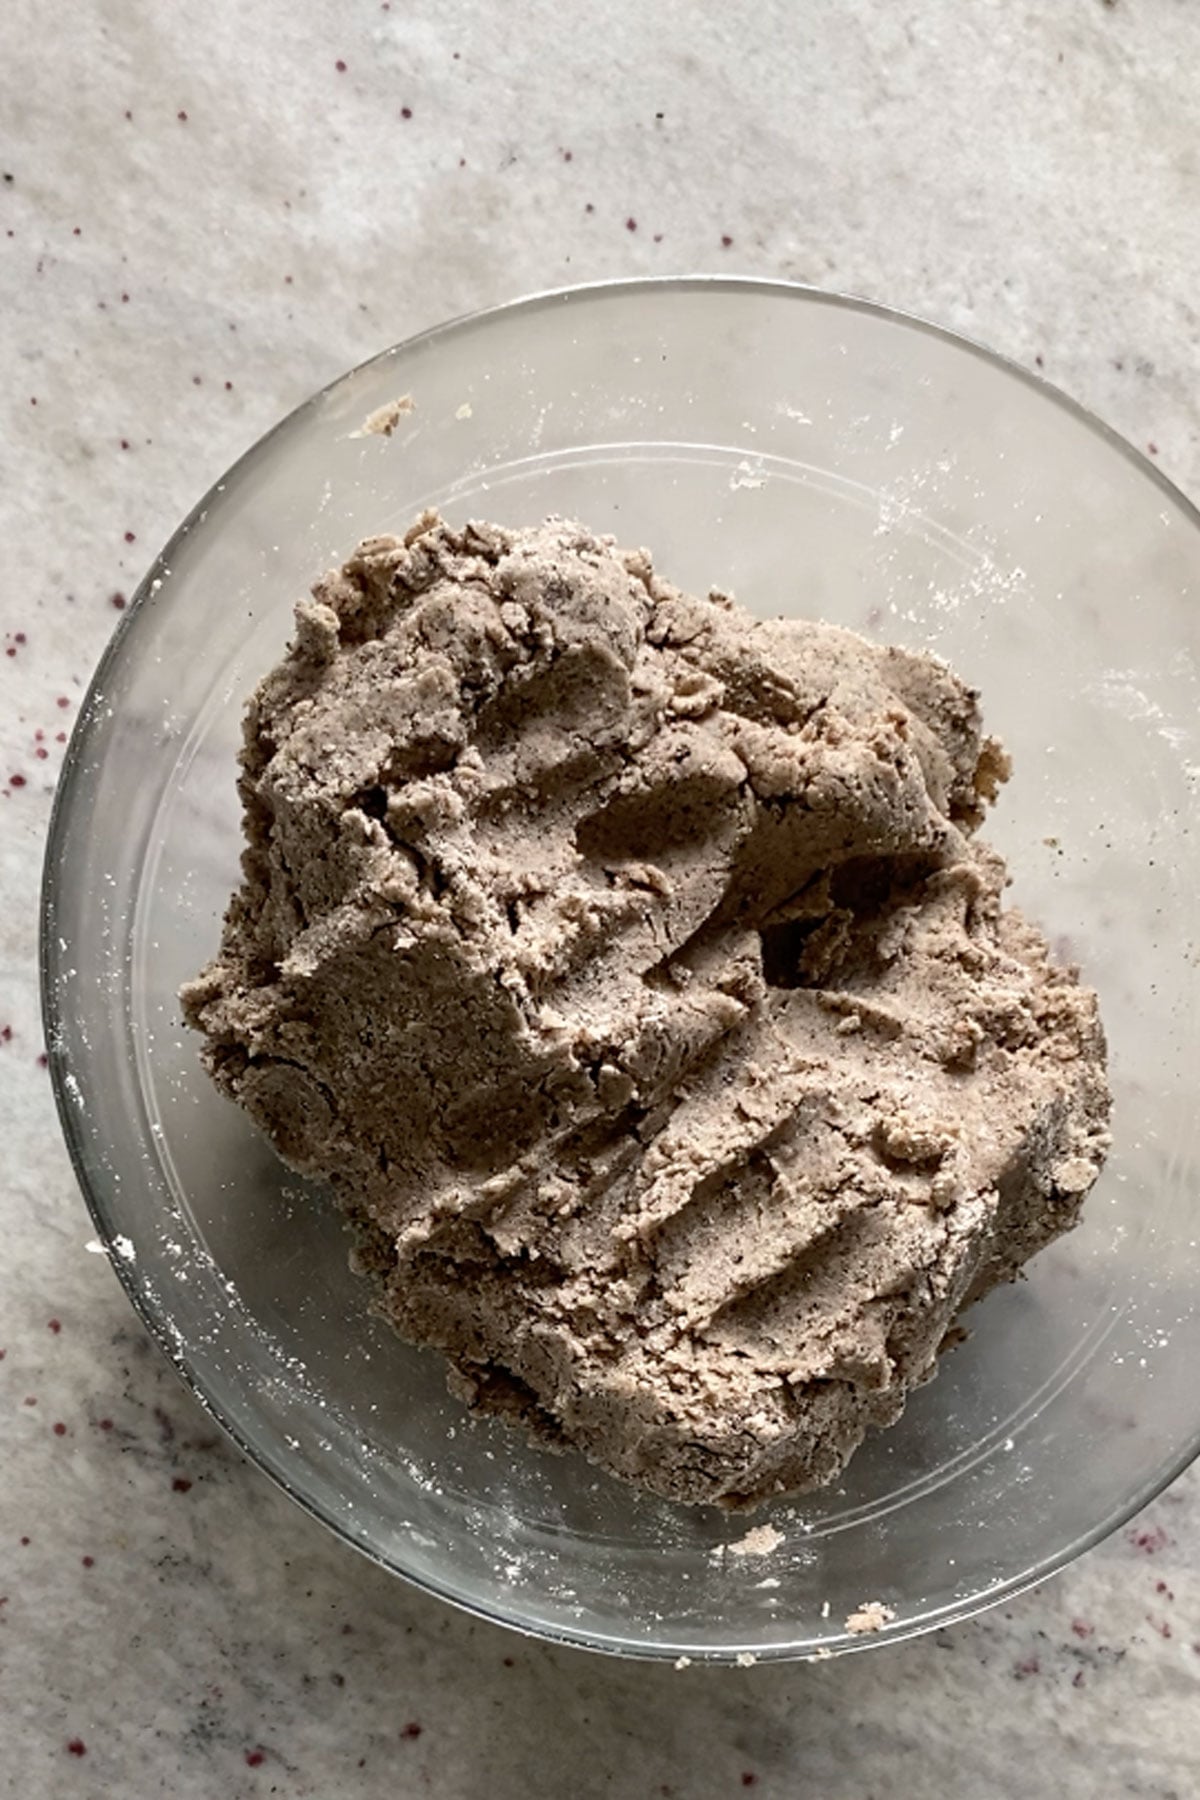
There's no chilling before you roll. Divide the dough in half and roll each piece to ¼ inch thick on a sheet of parchment paper. If the dough is sticky, roll it between two sheets.
Then chill the rolled dough for 30 minutes in the fridge or 15 minutes in the freezer. Cut out your shapes while the dough is still firm and cold.
Bake at 350°F for about 10 minutes, until the edges look set and the centers are no longer shiny. If you are using mini cutters (2 inches or less), the baking time will be shorter so be sure to check on the cookies after 5 minutes. Let the cookies cool completely on a wire rack before you ice them.
Tips for Sharp Halloween Shapes
As long as the dough is cold going into the oven, your shapes will hold. If the dough warms up while you're cutting, chill the cut cookies on the baking sheet for 15 minutes before baking.
You can re-roll the scraps at least twice before the cookies start to get less tender. Each time, they get a little darker as the Oreo crumbs spread through the dough. Save your last roll for the bats, since a darker cookie looks best under black icing.
One batch makes about 36 cookies, depending on the size of your cutters. Smaller shapes give you more cookies, and for skeletons, a smaller cutter works better anyway. More on that below.
Easy Icing for Halloween Sugar Cookies
This icing is just confectioners' sugar and a little milk or water. Stir it with a fork, adding the liquid a teaspoon at a time until it reaches the consistency you want. There are no eggs, no meringue powder, and no corn syrup.
It takes longer to dry than royal icing, but it's much easier to make. Once it sets, it's firm to the touch but still softer than royal icing. It's a cookie. Nobody should be worried about their teeth when biting into it.
Make one big batch of white, then split it into bowls. Keep one thicker for tombstone lettering, borders, and skeleton lines. Loosen another with a little more milk for flooding the ghosts. If any bowl gets too thin, stir in more confectioners' sugar. If it gets too thick, add a few drops of milk. Set aside one more portion if you're making black icing for the bats.
For more on how this icing dries and how to store leftovers, see my easy cookie icing post.
Black Icing for Halloween Cookies
You have two options for black icing.
Black gel food coloring gives you a true black, but you may need to add a lot of it. Heavily colored icing takes longer to dry, so give those cookies a full 24 hours before stacking them between sheets of parchment.
Or use black cocoa, the same trick I use in my black frosting. Stir it into a portion of the white icing a teaspoon at a time until it's dark. Cocoa absorbs moisture, so you may need to loosen the icing again with a little milk or water.
Black cocoa won't get you to a true black, but it comes close. It's what you see on the bats in these photos. As a bonus, it tastes a little like an Oreo.
How to Decorate Halloween Sugar Cookies
You can pipe all four shapes with piping bags and a small round tip. If you don't have piping bags, a DIY piping bag made from parchment works just as well for lettering and fine lines.
Tombstone Cookies
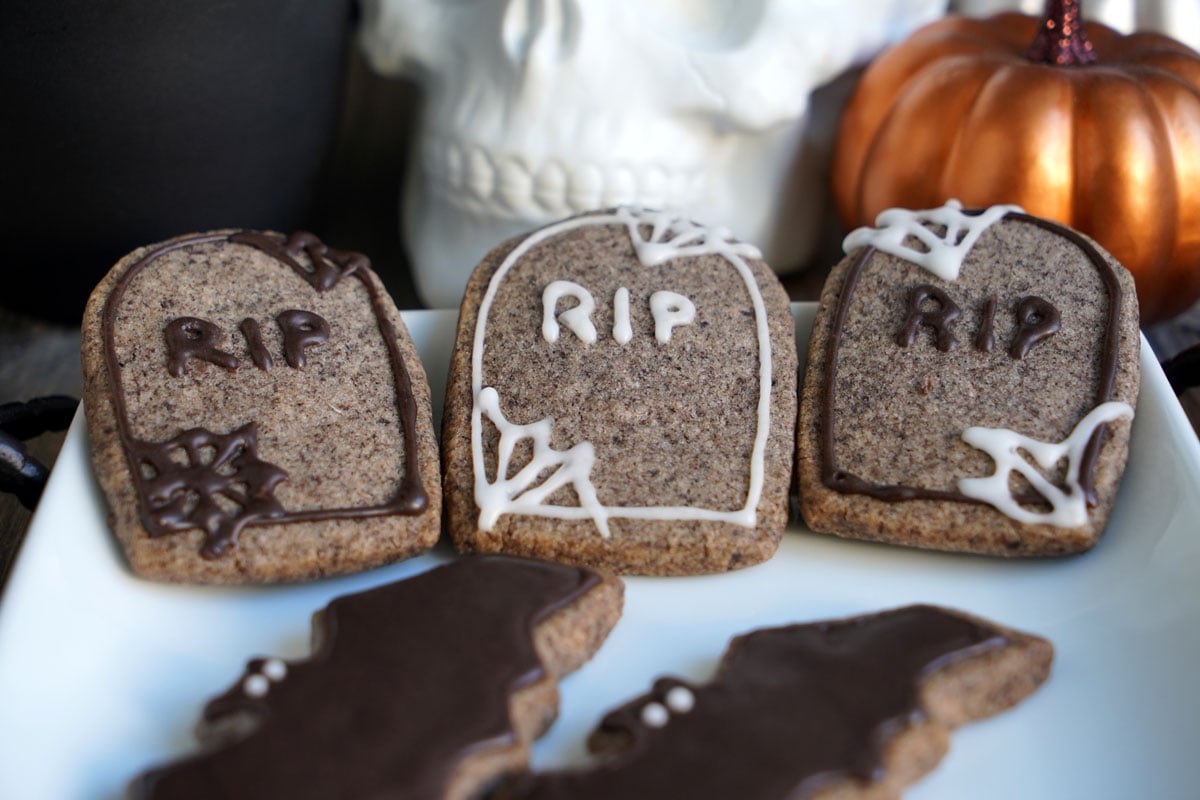
Tombstones are the easiest shape. Use the thicker icing to pipe RIP across the middle, then add a border or a spider web in a corner if you like. There's no flooding, since the speckled cookie already looks like stone. Try white, black, or a mix of both. My favorite is the black and white combo.
Ghost Cookies
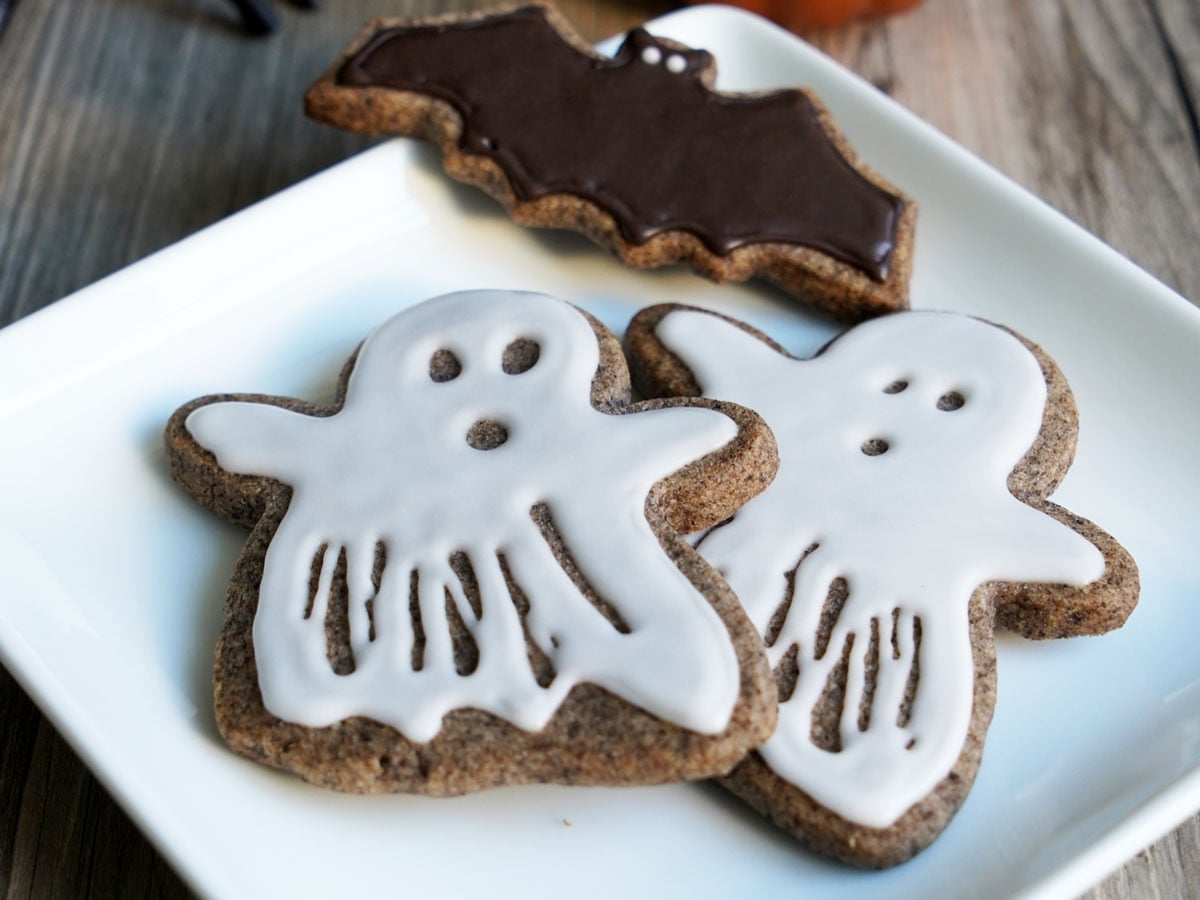
Pipe a quick outline with the looser white icing, then flood inside it. The outline is just a guide, so it doesn't need to be neat. For the eyes and mouth, leave small circular gaps while you flood. Make the gaps a little larger than you want them, or the loose icing may close them up and leave you with no eyes. I also leave parts of the bottom unflooded so the speckled cookie shows through and gives the ghost a wispy edge.
Bat Cookies
Flood the bats with black icing, spreading it close to the edges so a thin border of cookie still shows. Once the black has set, pipe two small dots of white icing for eyes.
Skeleton Cookies
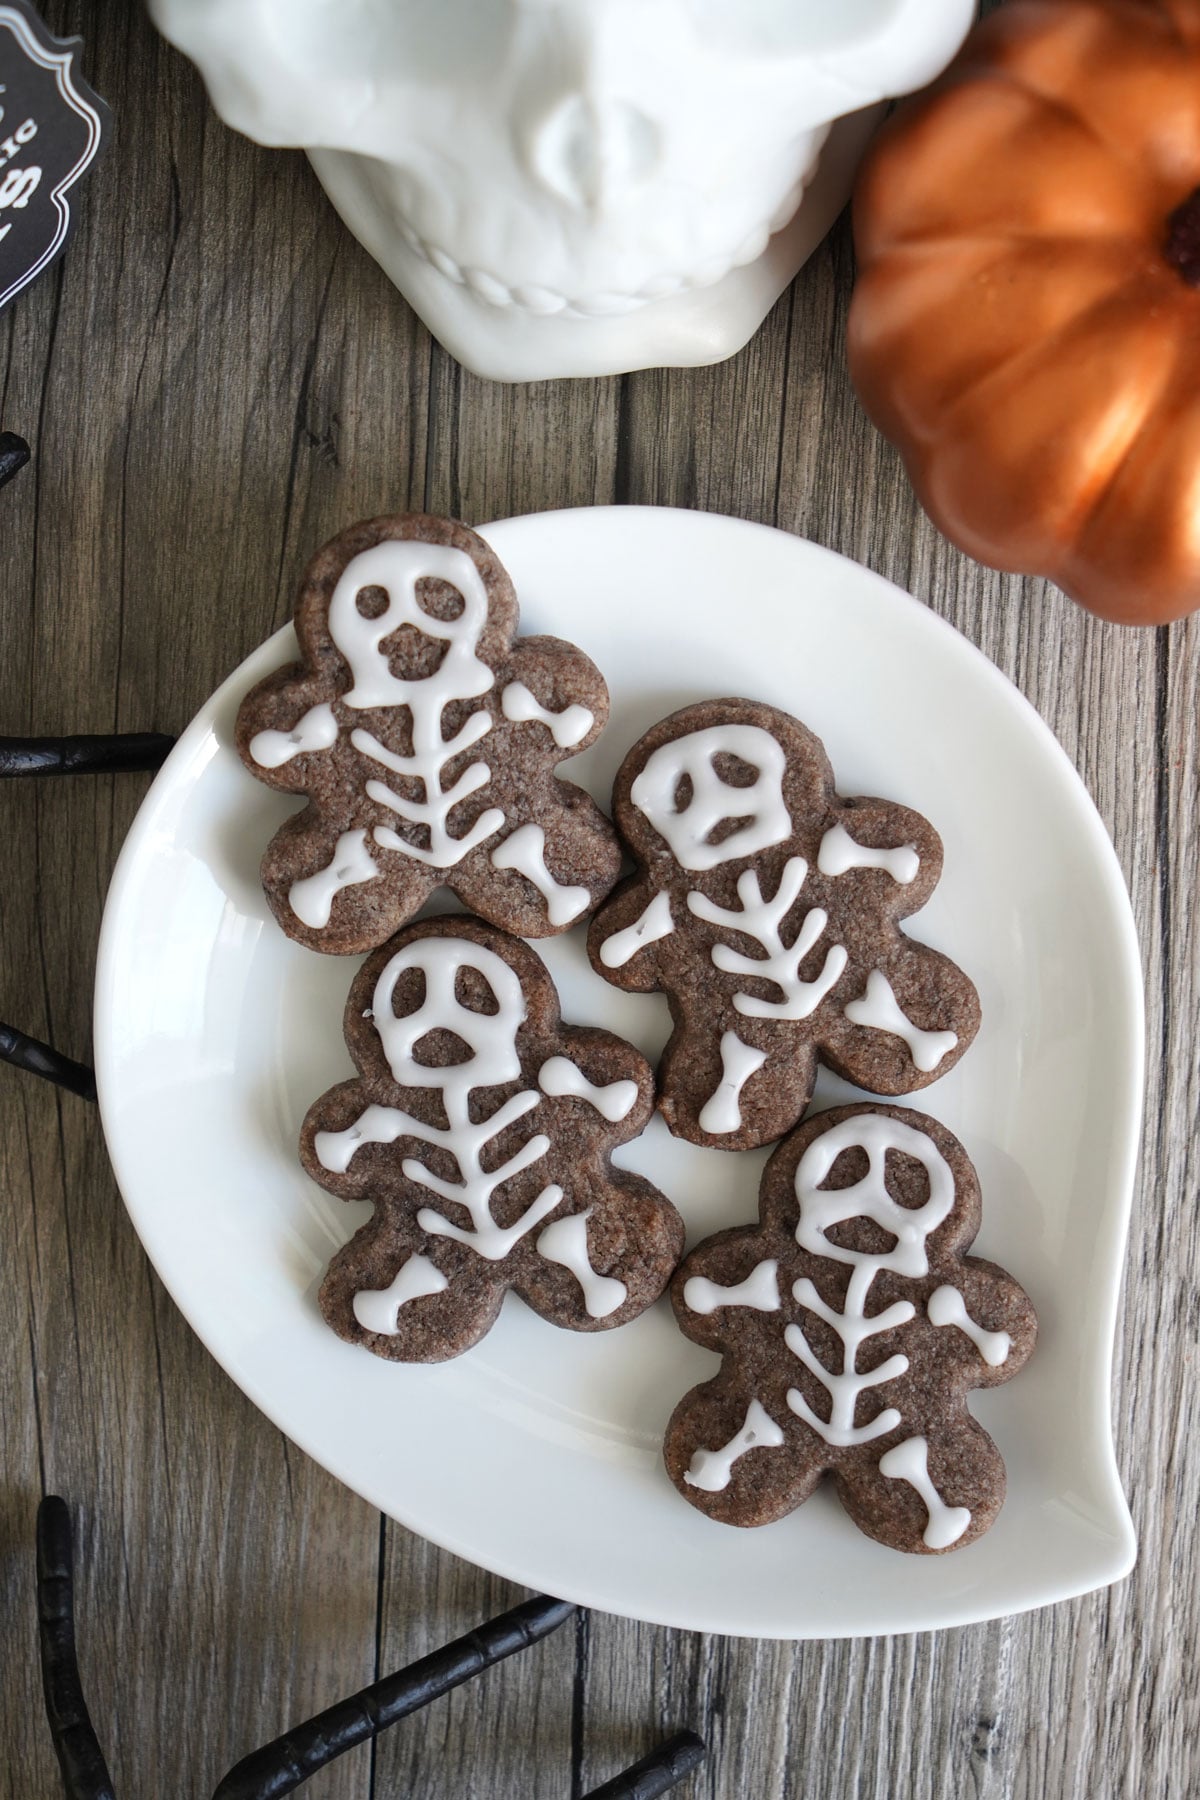
Skeletons are made with a gingerbread man cutter and decorated with nothing but white lines on the speckled cookie. Use a small cutter, about 2 inches tall. A skeleton is only lines, so on a larger cookie there isn't enough icing to balance all that cookie. A small cutter keeps the ratio right. Pipe the skull, spine, ribs, and arm and leg bones with the thicker white icing.
How to Store and Freeze Halloween Sugar Cookies
Let the iced cookies dry overnight before you pack them. That goes for both the white icing and the black cocoa icing. If you used black gel instead, give those cookies a full 24 hours, since heavily colored icing takes longer to dry.
Once the icing has set, stack the cookies in an airtight container with parchment between the layers. They'll keep at room temperature for up to 1 week.
Cookies decorated with white icing, like the ghosts, skeletons, and white-lettered tombstones, can be frozen for up to 1 month. Let them thaw fully at room temperature before you open the container. If you open it too soon, condensation forms on the cookies and makes the icing bleed.
Don't freeze anything with black cocoa icing. As it thaws, the icing turns blotchy and loses its deep color. Keep the bats and any black-lettered tombstones at room temperature instead.
More Cut Out Cookie Doughs for Halloween
If you want a darker cookie, my chocolate cut out cookies use real melted bittersweet chocolate instead of cocoa powder. They taste deeper and stay tender, and black icing bats look great on them too.
For a pale, buttery cookie, try my no spread cut out cookie dough. It comes together in a food processor and only needs to chill once. Both doughs hold their shape, so you can use the same cutters and decorating ideas from this post.
Halloween Sugar Cookies
Speckled Oreo sugar cookies cut into tombstones, ghosts, bats, and skeletons, decorated with an easy two-ingredient icing. The black icing uses black cocoa instead of food coloring.
Ingredients
For the Cookies
- 3 cups all purpose flour (360g)
- 2 teaspoons baking powder
- ¼ teaspoon salt
- 8 Oreo cookies, with filling (90g), crushed to make ¾ cup crumbs
- 1 cup unsalted butter, cold and cubed (226g)
- 1 cup sugar (200g)
- 1 large egg
- 1 teaspoon vanilla extract (5 ml)
For the White Icing
- 4 cups confectioners’ sugar (500g)
- 4 to 8 tablespoons milk or water (60 to 120 ml)
For the Black Icing
- Black cocoa powder, as needed
Instructions
- Pulse the whole Oreos in a food processor until you have crumbs. Don’t leave large chunks, but don’t make them too fine.
- Whisk together the flour, baking powder, salt, and Oreo crumbs in a large bowl. Set aside.
- In the food processor, process the butter and sugar until light and fluffy. Scrape down the sides at least once.
- Add the egg and vanilla and process until just combined.
- Add the flour mixture and pulse until just combined. If it doesn’t mix well in the food processor, turn it out into a bowl and bring the dough together by hand.
- Divide the dough in half. Roll each half to ¼ inch thick on a sheet of parchment. If it’s sticky, roll it between two sheets.
- Chill the rolled dough for at least 30 minutes in the refrigerator or 15 minutes in the freezer. Meanwhile, preheat the oven to 350°F and line baking sheets with parchment.
- Cut out tombstones, ghosts, and bats, and use a 2-inch gingerbread man cutter for skeletons. If the dough is no longer cold, chill the cut cookies for 15 minutes.
- Bake for about 10 minutes (for smaller cookies, check after 5 minutes), until the edges look set and the centers are no longer shiny. Cool for a few minutes, then transfer to a wire rack and cool completely before icing.
- Gather the scraps, re-roll, and repeat steps 7 to 9. Save the last roll for bats, since it’s the darkest.
- Make the icing: put the confectioners’ sugar in a bowl and stir with a fork, adding the milk or water a teaspoon at a time until it reaches the consistency you want.
- For black icing, set aside a portion and stir in black cocoa 1 teaspoon at a time until dark. Loosen with a little milk or water if it thickens.
- Divide the remaining white icing. Keep one bowl thicker for lettering, borders, and skeleton lines. Loosen another with a little more milk for flooding.
- Decorate. For tombstones, pipe RIP and spider webs with the thicker icing. For ghosts, pipe a quick outline with the looser white icing as a guide, then flood inside it, leaving gaps for the eyes and mouth and parts of the bottom unflooded. For bats, flood with black and add white icing dots for eyes once the black has set. For skeletons, pipe white lines with the thicker icing.
- Let the cookies dry overnight before packing.
Notes
- Scraps can be re-rolled at least twice. The cookies get darker each time as the crumbs spread through the dough.
- Yield depends on your cutters. For skeletons, a small 2-inch cutter gives enough icing for the amount of cookie, since a skeleton is only lines.
- For a true black, use black gel food coloring instead of black cocoa. Heavily colored icing takes longer to dry, so give gel-black cookies a full 24 hours before stacking between sheets of parchment.
- Store iced cookies in an airtight container at room temperature for up to 1 week. White-iced cookies can be frozen for up to 1 month; thaw fully at room temperature before opening the container so condensation doesn’t make the icing bleed. Don’t freeze cookies with black cocoa icing, because it turns blotchy and loses color as it thaws.
Nutrition Information:
Yield: 36 Serving Size: 1 cookieAmount Per Serving: Calories: 207Total Fat: 6gSaturated Fat: 3gUnsaturated Fat: 2gCholesterol: 20mgSodium: 58mgCarbohydrates: 38gFiber: 1gSugar: 29gProtein: 1g
This nutrition information is only an approximate provided for convenience and as a courtesy only. Information comes from Nutritionix, an automated nutrition calculator.

Comments
No Comments