You don’t need to invest in fancy tips and pre-made piping bags to ice your cookies. All you need is a sheet of parchment paper to make your own piping bag!
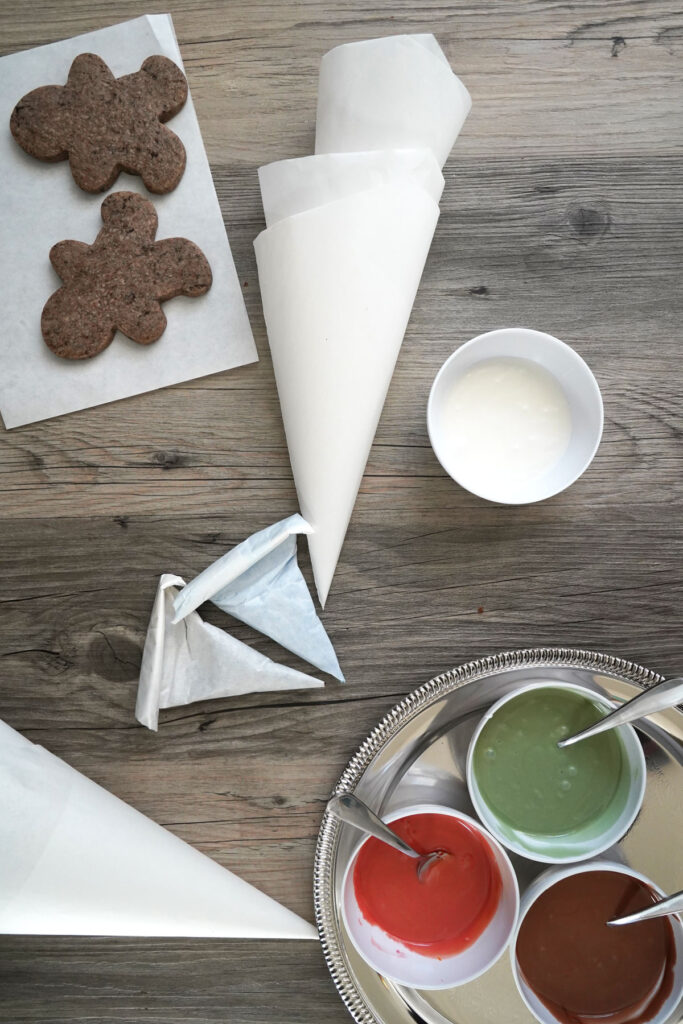
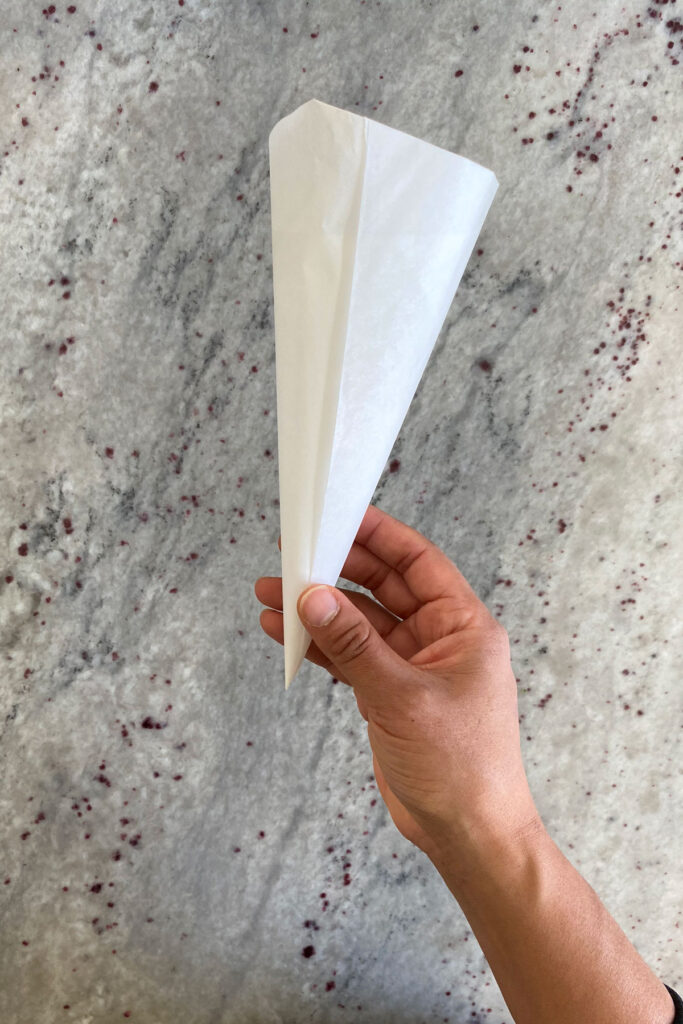
Parchment paper cones or paper cornets are an easy way to make your own piping bag. I actually find that I have more control icing cookies with these DIY piping bags, especially when piping details.
They are small enough for my hands and don’t have the bulk of a store bought piping bag or the squishiness of a homemade plastic bag.
You also don't have to buy any metal tips! You can determine the size of the opening by deciding how big to cut the tip.

How to Make Your Own Piping Bag
I highly recommend keeping a stash of parchment paper sheets on hand in your kitchen. They fit a standard half sheet pan and stay flat, unlike the parchment paper rolls. I use sheets that are roughly 16 inches by 12 inches.
First, cut the sheet into triangles by folding the sheet in half lengthwise and making a sharp crease. Using a sharp paring knife or scissors, cut the sheet into two triangles.
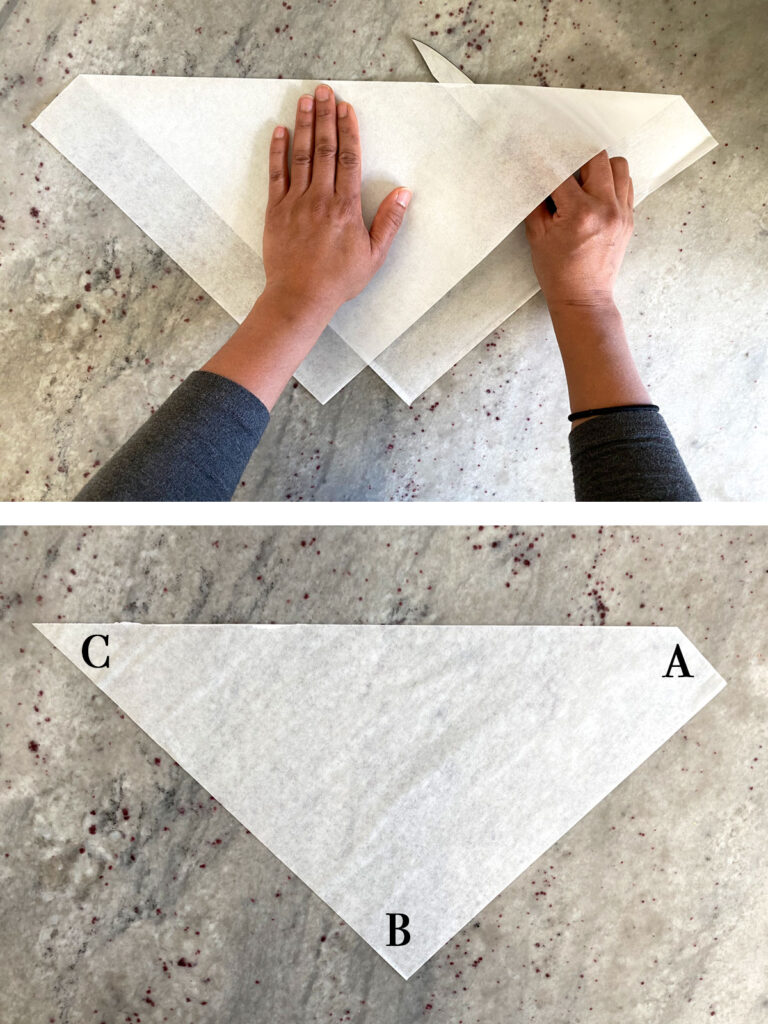
Next, place the sheet in front of you with the longest side away from you and the shortest side to your right. Take the right corner (A) and roll it toward the point nearest to you (B). It does not need to be a tight roll yet. While holding points A and B together with your right hand, bring the left corner (C) toward point B by bringing it over the cone and around to the bottom.
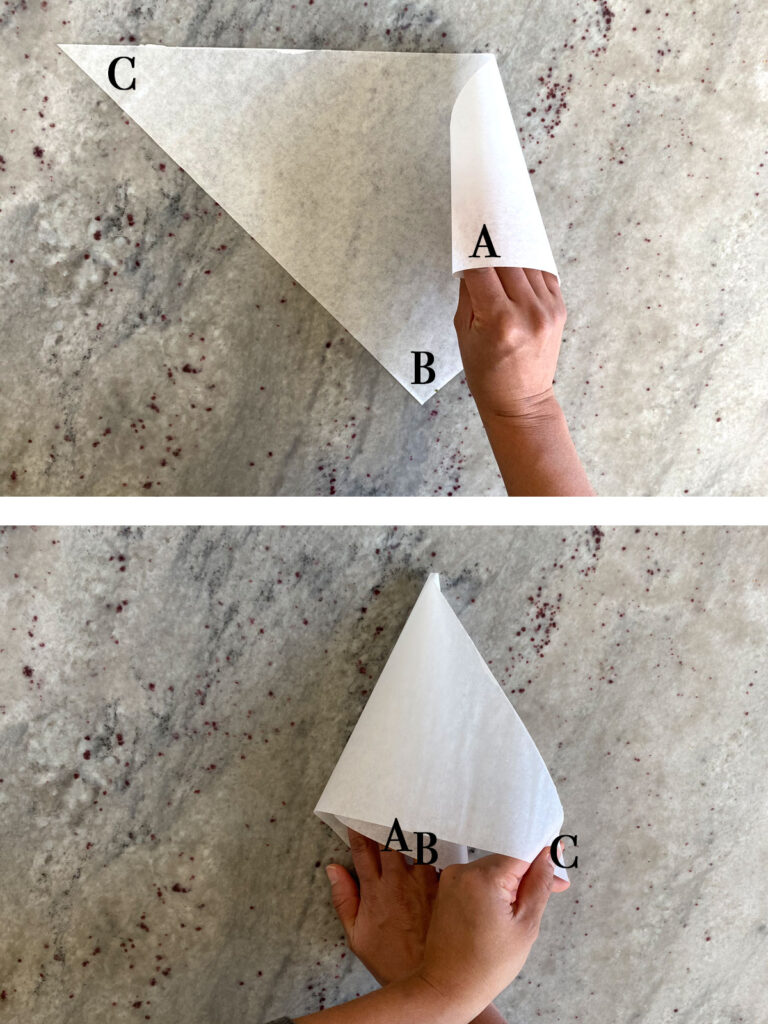
Form the cone’s pointy tip by sliding the corners until you have a sharp pointed cone. This may take some playing around.
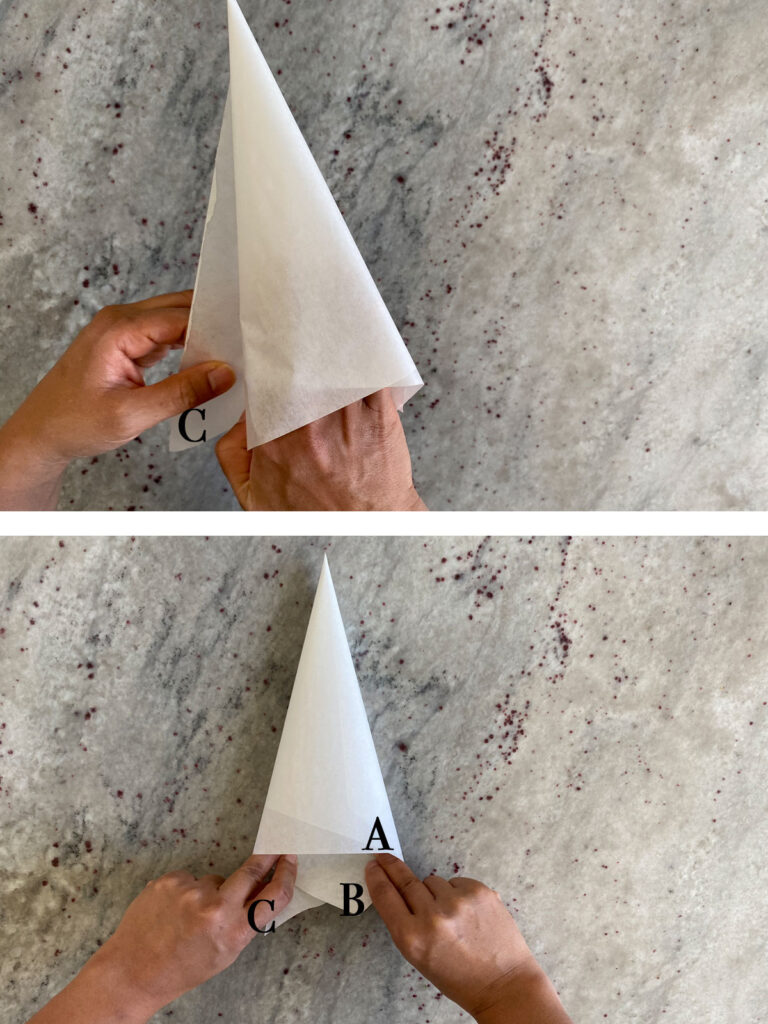
Finally, when you have a sharp point at the top, tuck the top part of the cone (Points B, and C) into the cone. This will hold the cone’s shape. Note that the cone has a seam on the outside. Some people suggest taping this seam, but I find that tape rarely sticks well to parchment paper.
Believe it or not, if everything is done right the cone will hold without tape. Tighten all your fold lines by sharpening the crease with your fingers.
How to Fill and Pipe
Place the cone inside a small glass. Drop in cookie icing by the spoonful but do not overfill. Be sure to leave at least 2-3 inches on the top.
Again, note which side has the seam! This is the side you want to fold away from when closing the top. If you fold it the other way, the contents of your cone will ooze out. To close the top, fold in the two corners and then fold down twice.
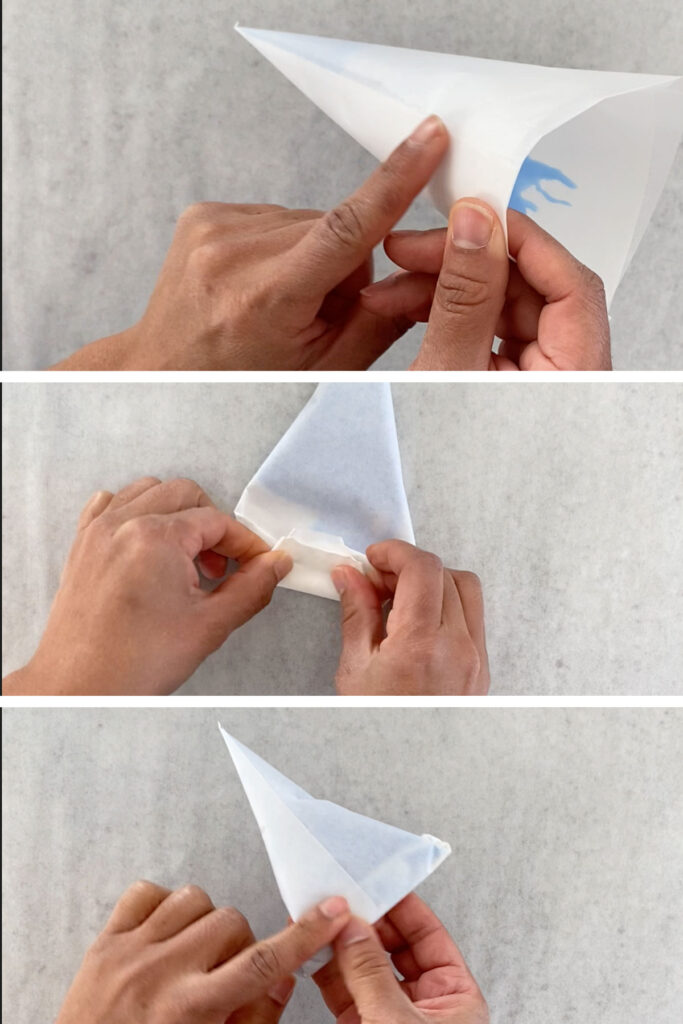
Cut the very tip of the cone to the opening size that you need for piping. Remember, if you are piping details to make the hole small. If you are unsure, cut small first, test and then make it bigger as needed.
When piping with the cone, hold the cone in your hand by keeping your thumb on the seam and grasp it to keep the folds closed.
5 Uses for Parchment Cones:
- Icing cookies: My number one use of parchment paper cones! These are especially useful when decorating cookies that have lots of colors. Sometimes, you only need a small amount of one color. It’s far easier to put a small amount of icing into a parchment cone than a plastic piping bag. Usually, the smallest disposable bag you can buy is 12 inches and that is still too large for small amounts.
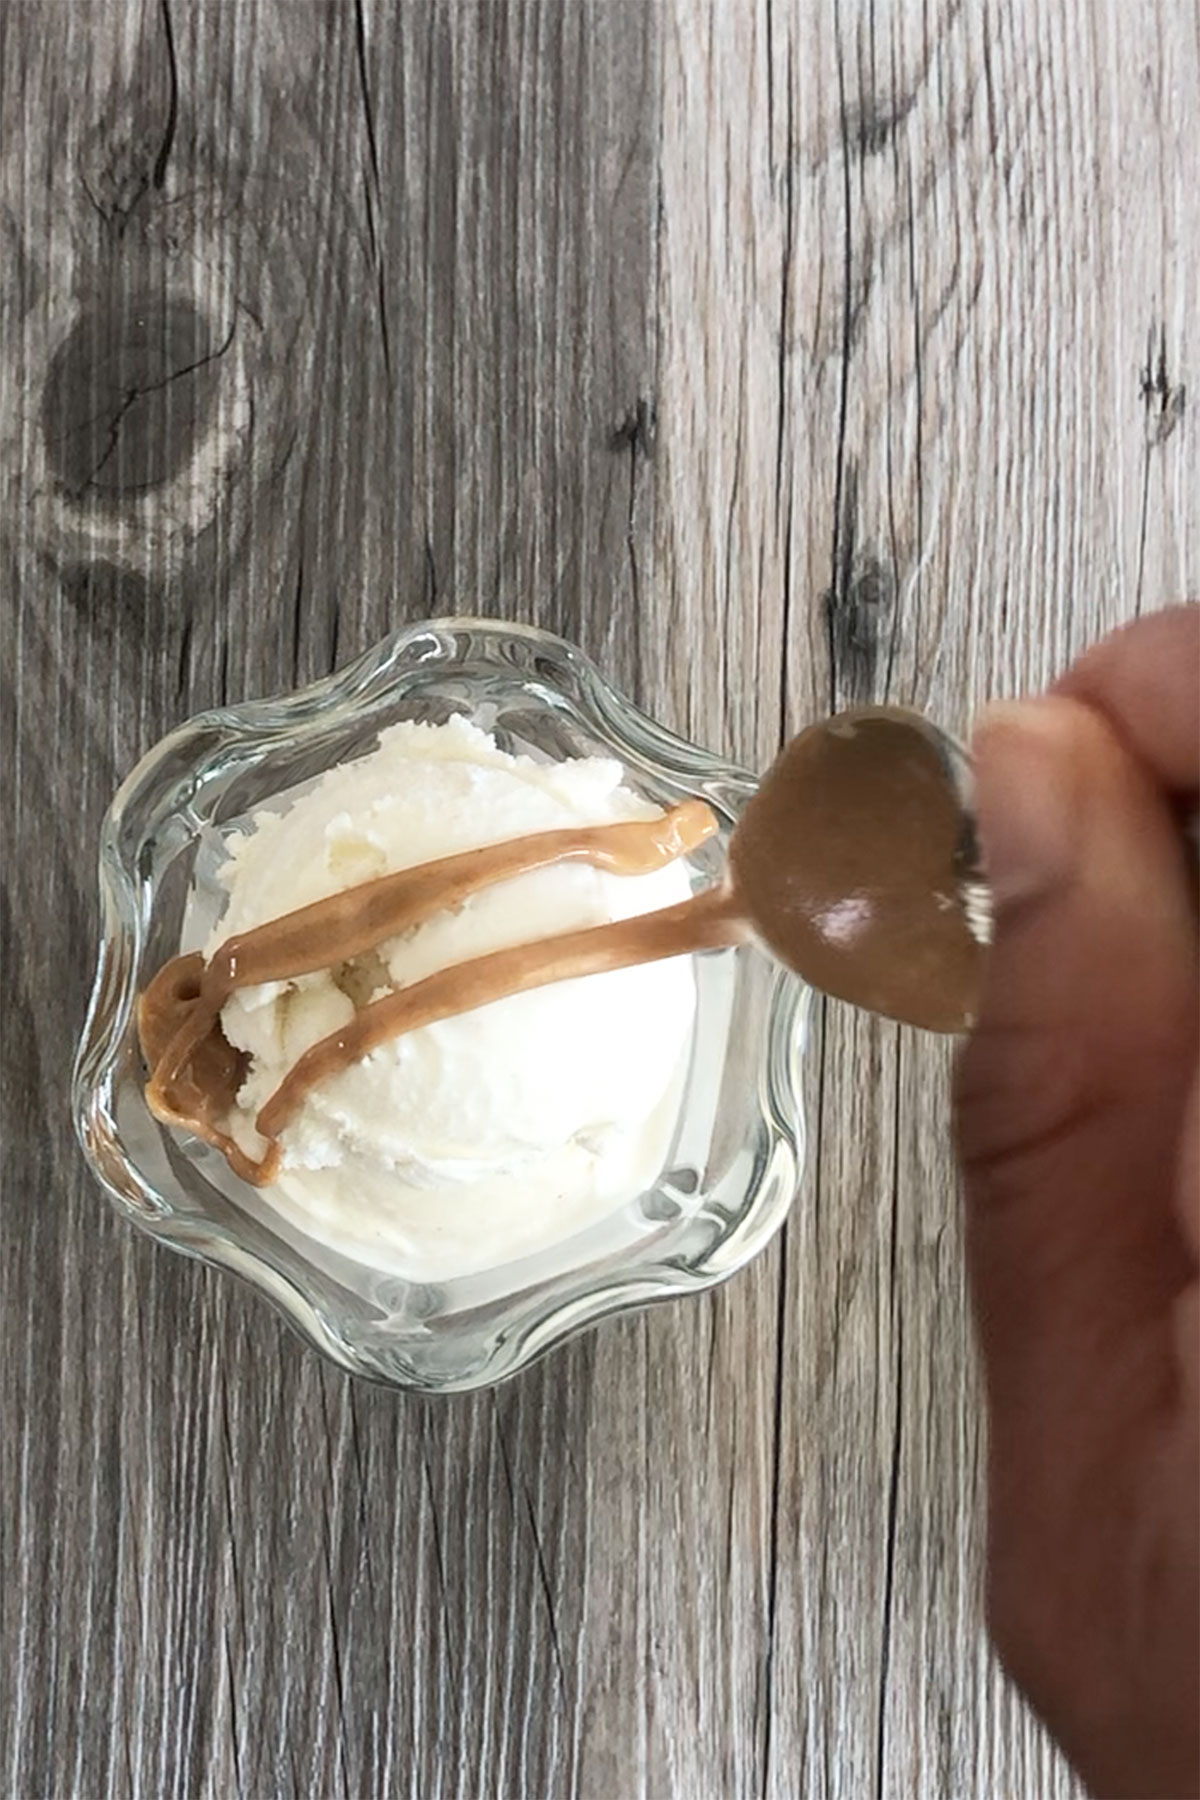
- Drizzle peanut butter: I love drizzling peanut butter over ice cream and acai bowls.
- Drizzle ganache: Make pretty ganache patterns over cakes and cupcakes.
- Write on cakes
- Funnels for filling bottles with small necks: Use parchment cones to get those dessert sauces into squeeze bottles!












Comments
No Comments